For several months in my campaign, Bridgefaire, the largest free city known to the players, has been under siege by a huge horde of undead. Last weekend we finally resolved that siege, via a huge game of Book of War, with author and special guest Delta helping me to control the attacking side while my players controlled the defense. BigFella, a former player in the campaign and good friend, was also able to join us bringing the attackers side up to 3 and taking some very nice photos for us.
We used the 10 mm figures I’ve been hooked on painting recently, which had the benefit of being fast and enjoyable for me to paint. I also quite like the fact that their height is a little more appropriate to the scale of Book of War: 1″ = 20′. That said, the game is clearly written for larger figures, so we did have to do some interpretation. I also made quite a bit of custom terrain, as you’ll see in the photos. So, let’s get on with the battle report (picture intensive, be prepared for a potentially slow load!):
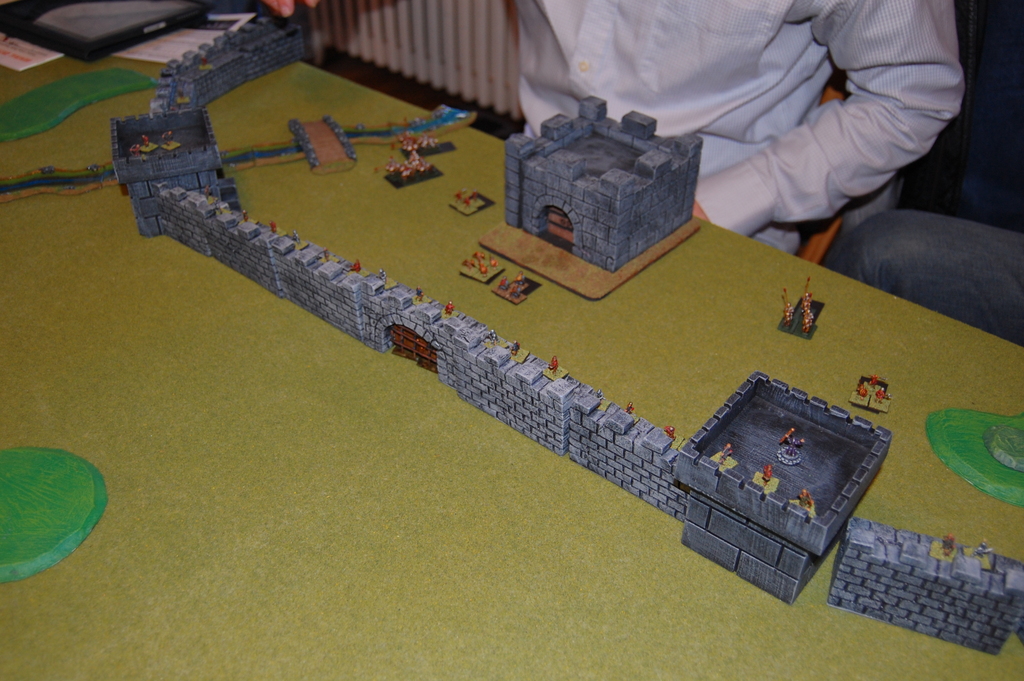
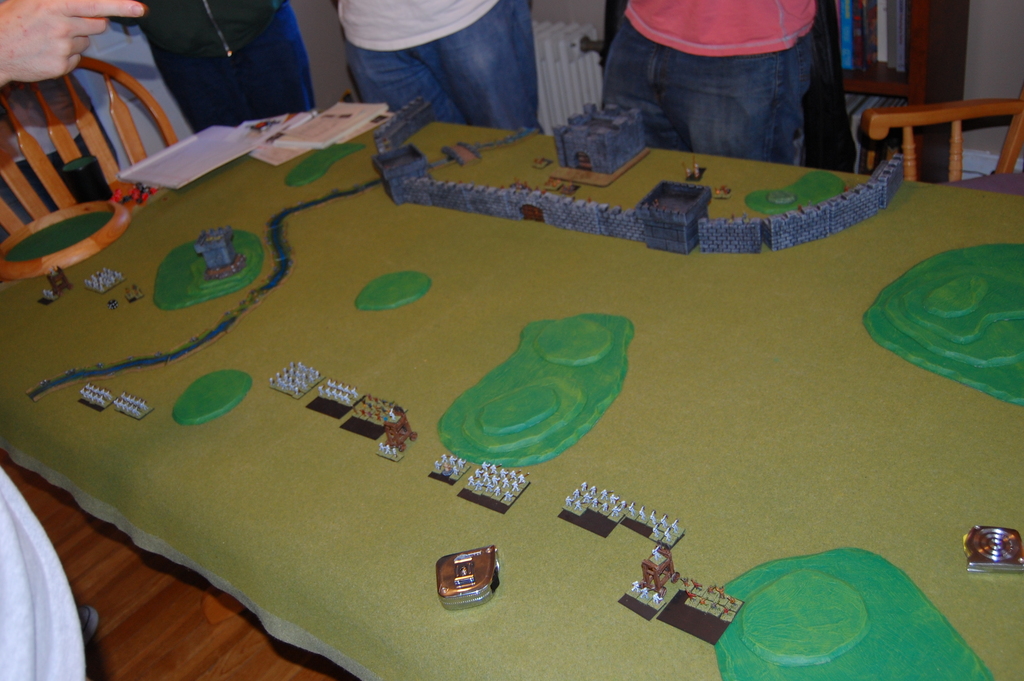
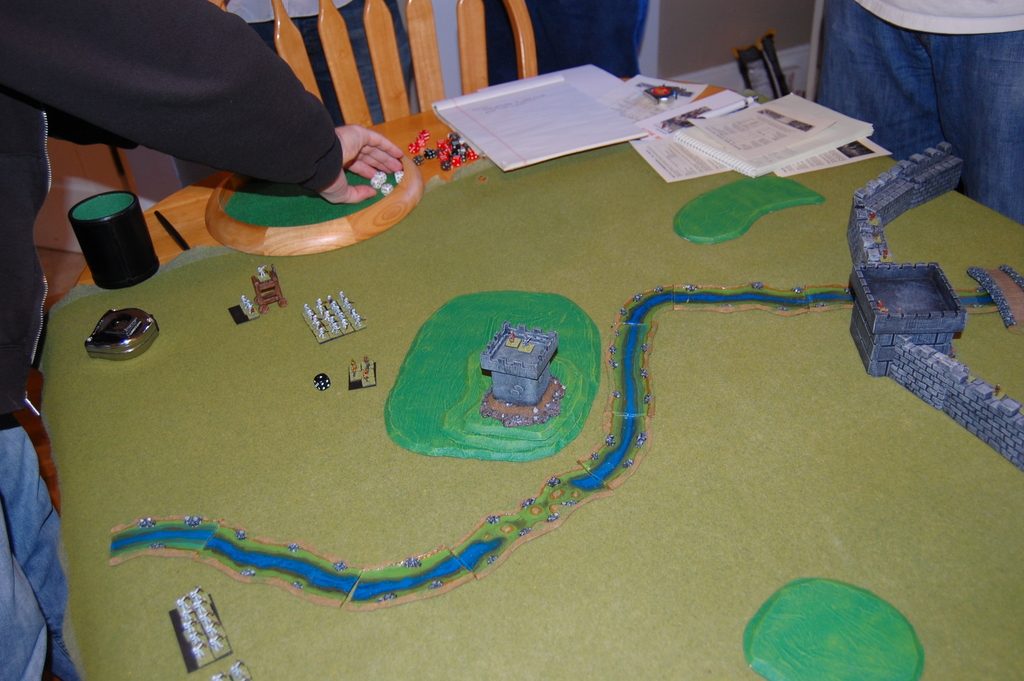
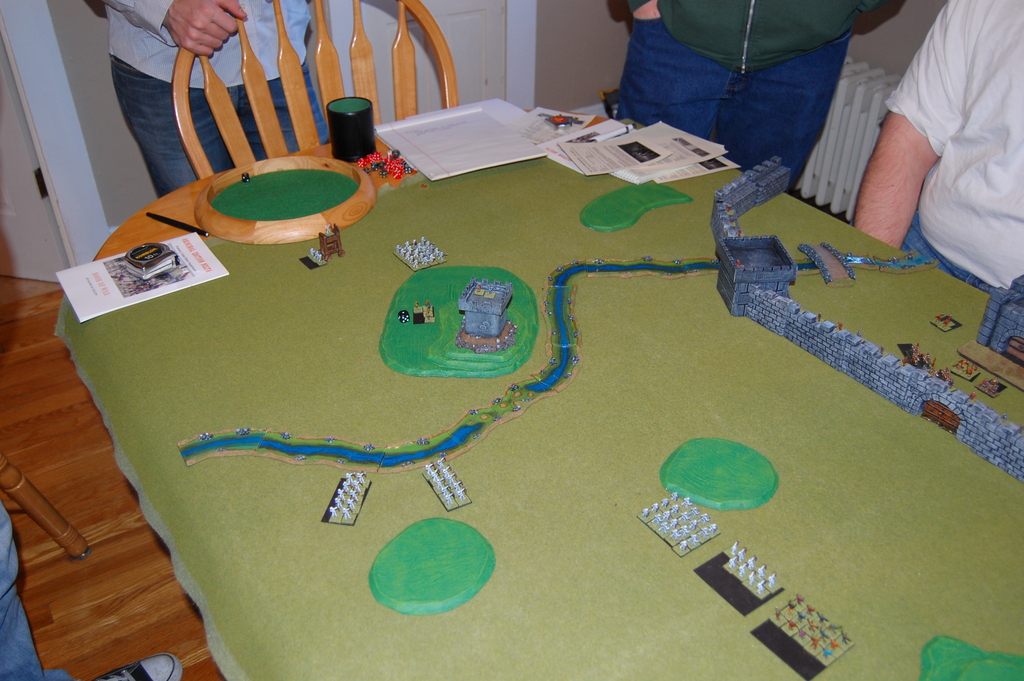
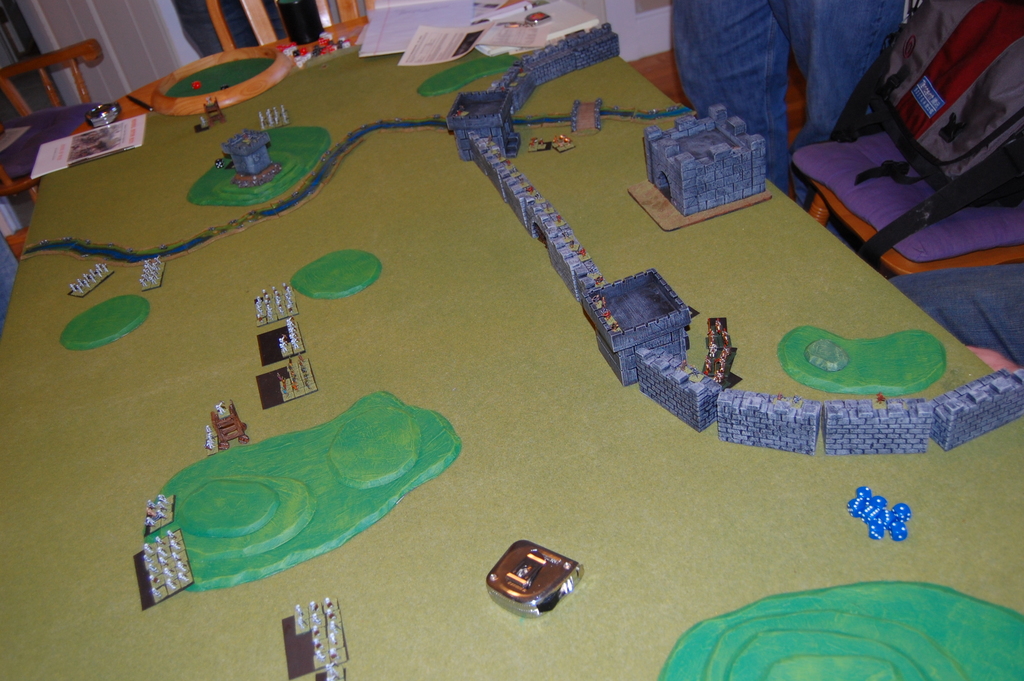
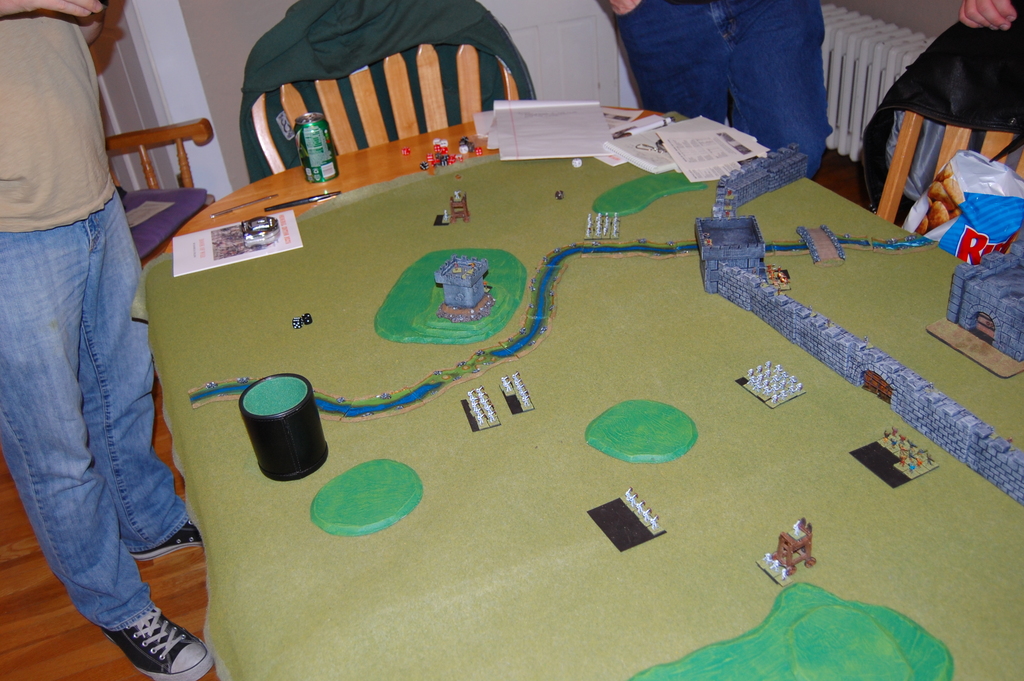
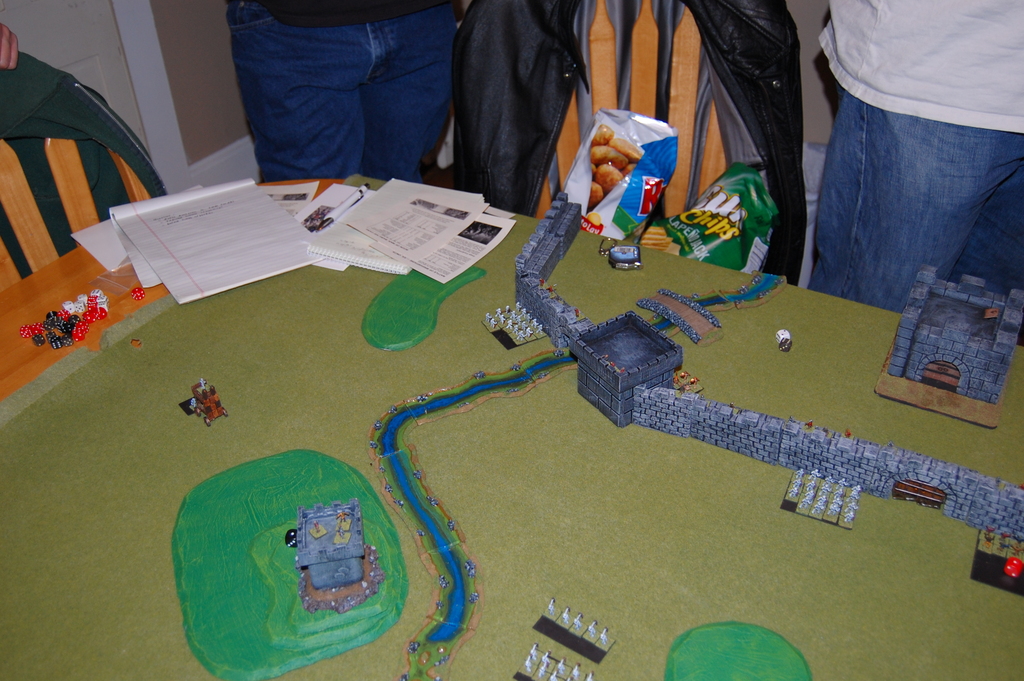
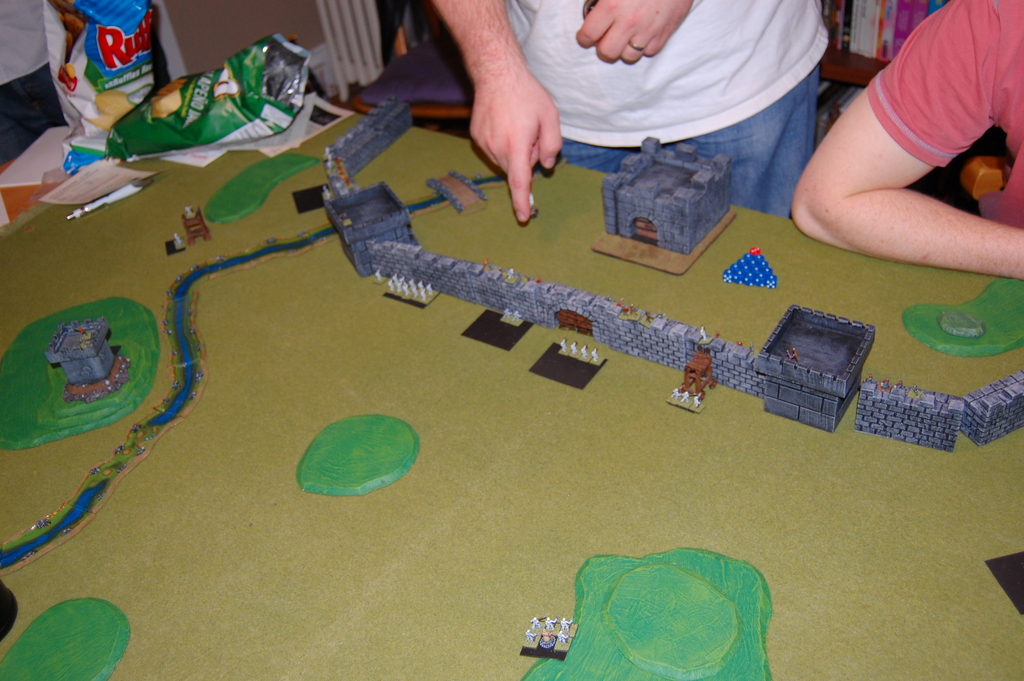
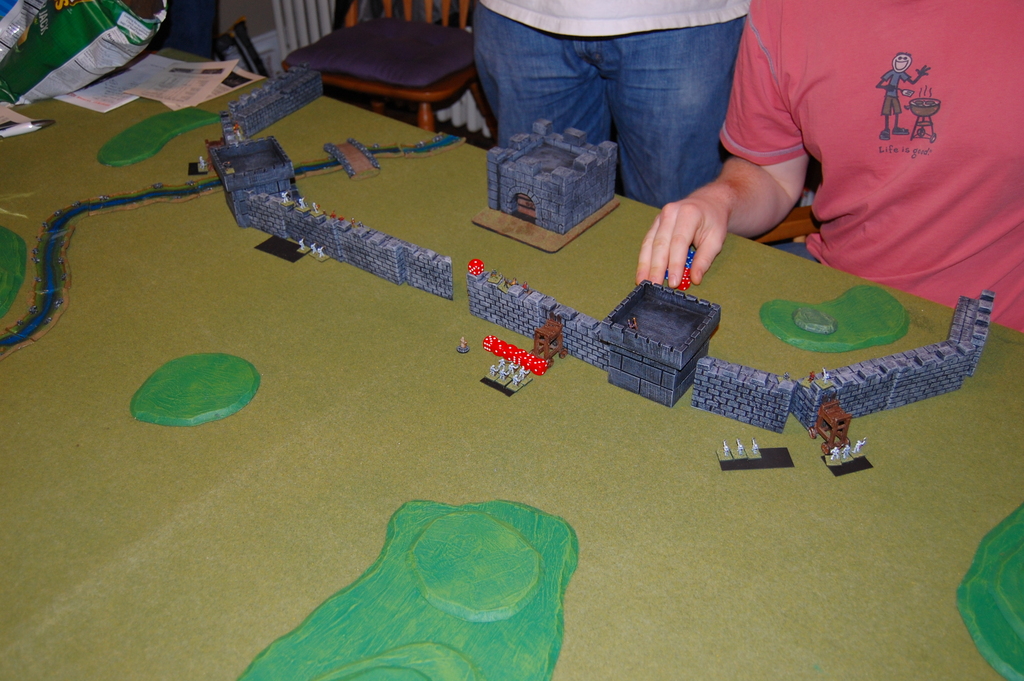
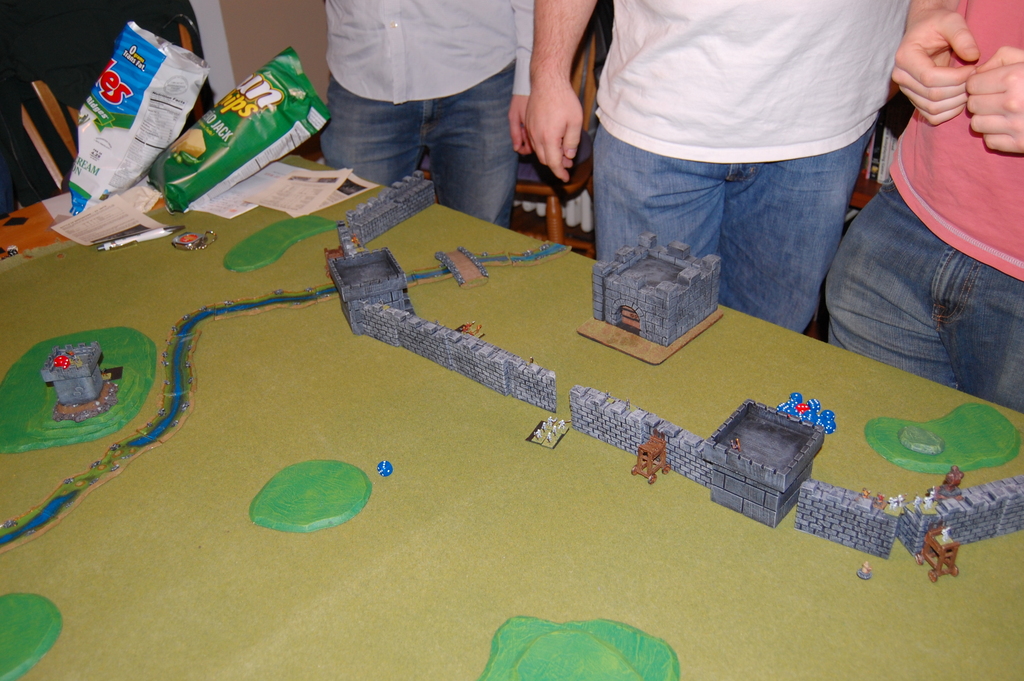
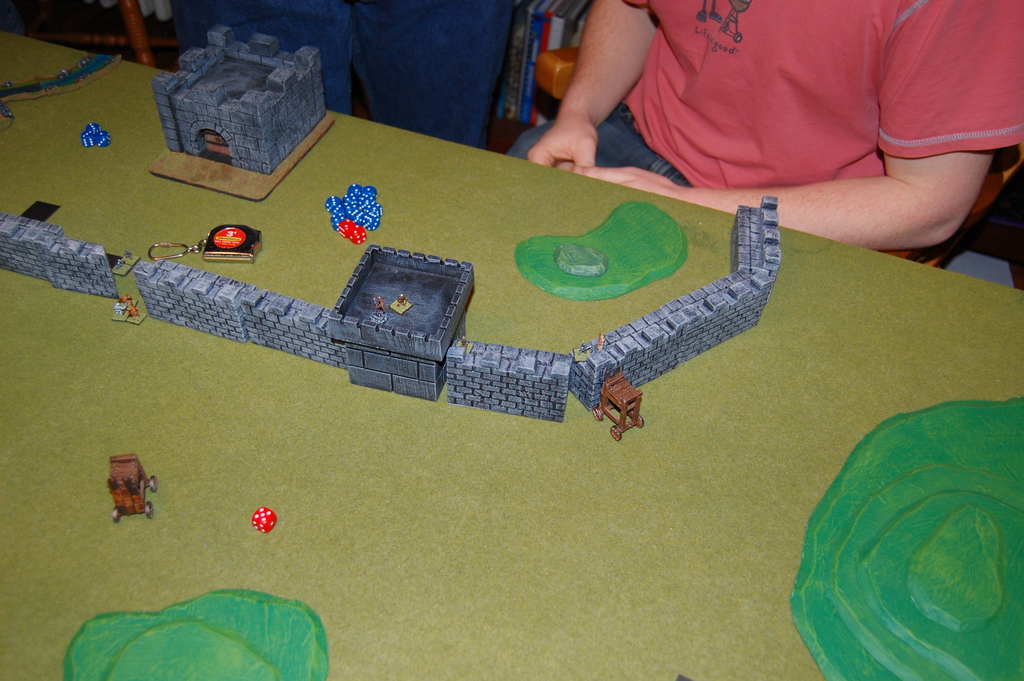
Here we can see the defense’s starting positions. The walls are manned by a mix of heavy infantry (9 total), archers (13 total) and crossbowmen (10 total). Held in reserve are 3 units of medium cavalry (3, 4, and 3), 3 units of light infantry (3, 4, and 3), and one unit of acolytes (3). The acolytes are units of 1st level clerics, acting as light infantry, but also with the ability to once per game turn undead, destroying 1d6 models of skeletons or 1d3-1 models of zombies. On the right-most tower you can also see Pelltar the sorcerer, a 9th level magic-user and veteran of the Battle of Restenford. Not pictured is the tower at River’s Ford, a small tower outside the main walls of the city that overlooks a fording point of the river. The players were given the option of position some men at that tower, which they did: 1 model of heavy infantry and 5 of archers. The players also got to choose in secret Pelltar’s top level spell (Conjure Elemental or Wall of Stone) and one section of wall which would contain a sally port, through which they could move units at a movement penalty of 3″.
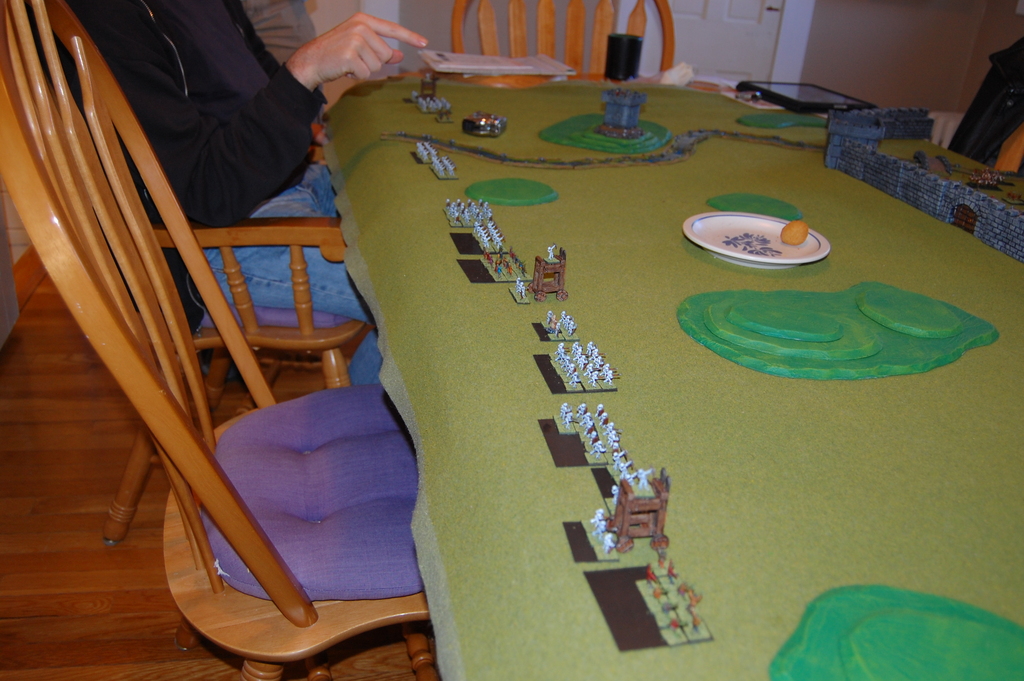
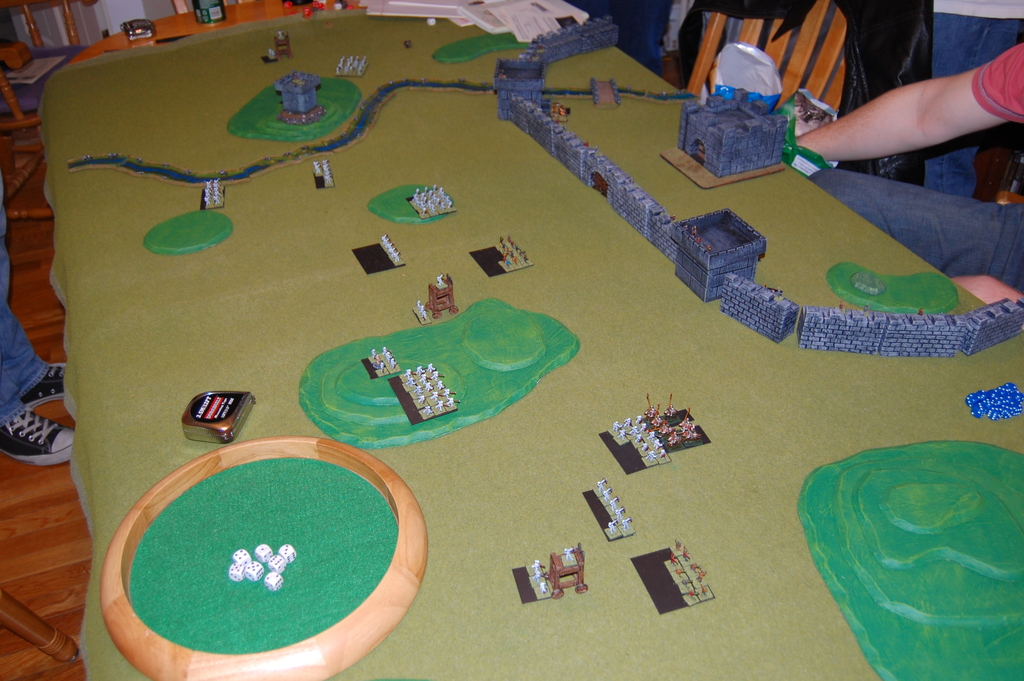
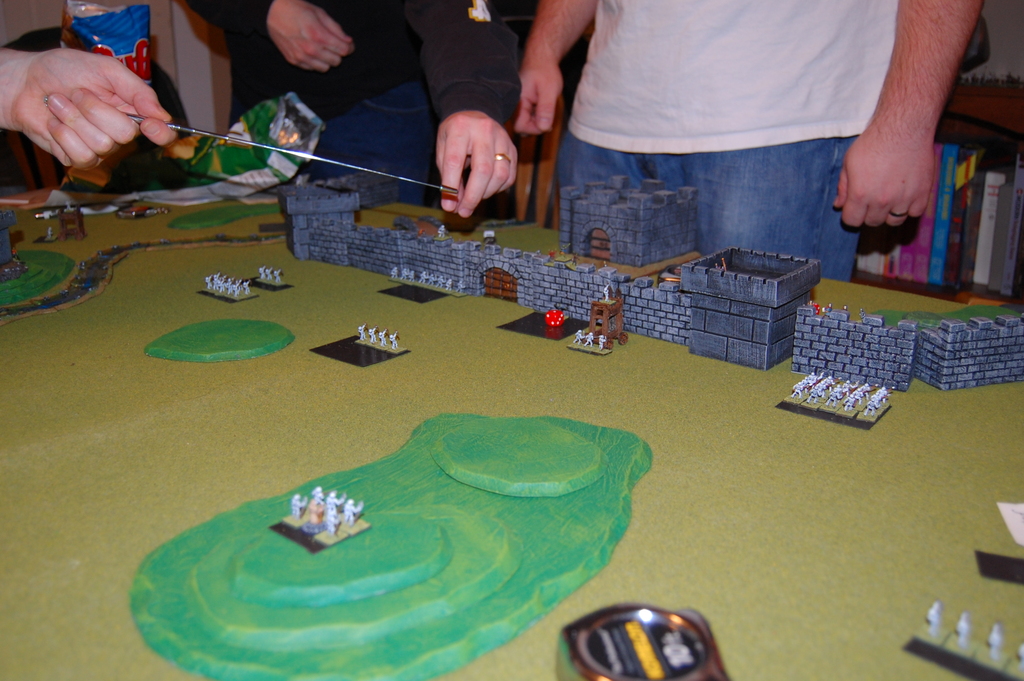
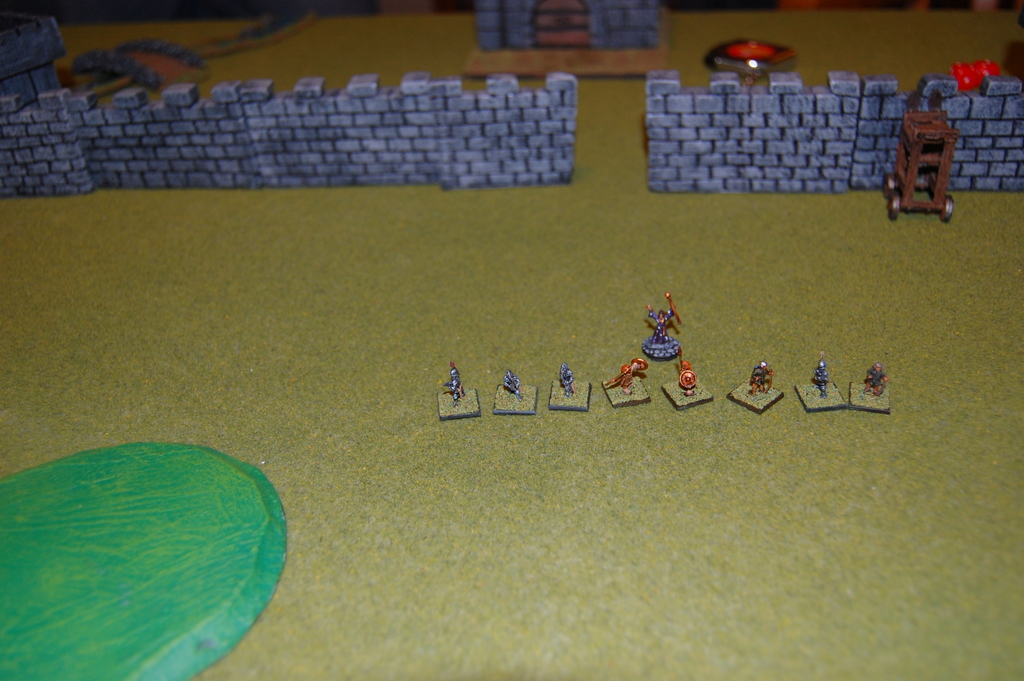
Here is the attacking force, with commander Delta pointing out our first objective: the last remaining potato puff. From foreground to back, we start with BigFella’s forces: 9 zombies, 3 skeletal infantry pushing a siege tower containing 1 skeletal archer, 7 more skeletal archers, and 12 skeletal infantry. Next are my forces: 15 skeletal infantry, 6 more skeletal infantry with their necromancer leader embedded, another siege tower similarly equipped to the first, 15 zombies, 10 skeletal archers, and 20 more skeletal infantry. Finally Delta’s force: 2 units of 10 skeletal archers each, then across the river 6 zombies, 20 skeletal infantry, and the final siege tower. All told that’s 150 models of undead, which at Book of War scale (1 model = 10 men) is 1500 undead!
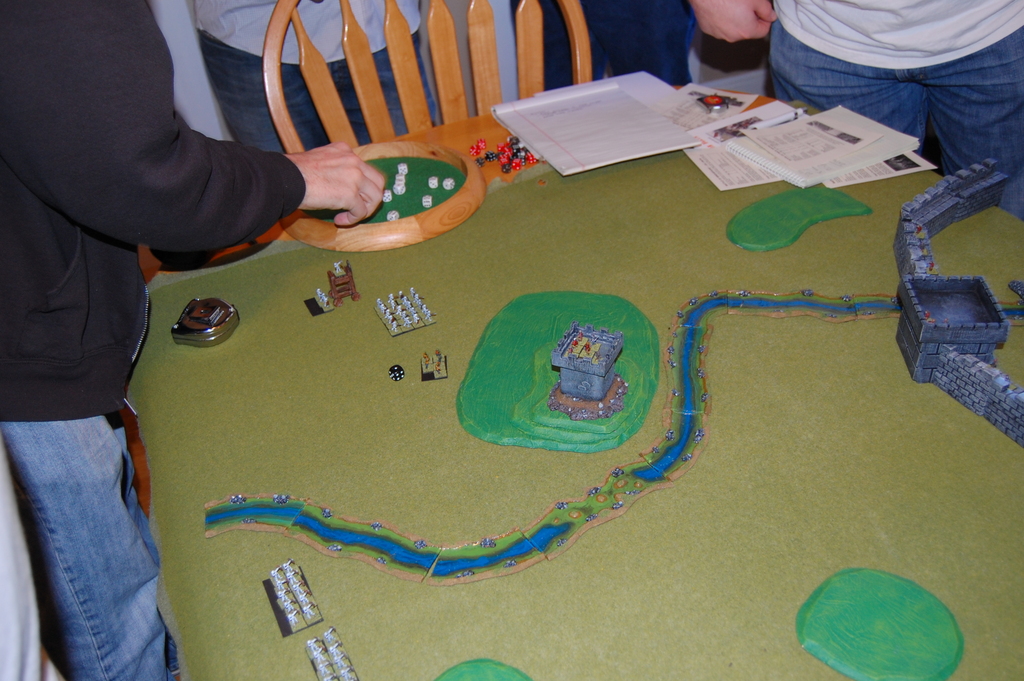
Turn 1 starts with the defense. Everything is out of range so there’s not much for them to do. The archers at River’s Ford Tower, however, are in range and fire into the small unit of zombies near them, doing 3 damage and thus removing 1 model (zombies are 2 HD). The undead in response shambles forward. They move pretty slow, only 6″ for most undead units, and 4″ for those pushing siege towers. Note the 2 units of skeletons near the river: they decide not to move, and instead send a hail of arrows at the archers atop Rivers Ford Tower. That’s 20 archers at 2 dice each since they did not move — Delta rolls 40 dice!
The effect as you can see is devastating. One model (10 men) may be elected by the defense to be positioned inside the tower at arrow slots, making them invulnerable to the attack — the defenders pick one of the archer models. The heavy infantry due to their heavy armor and the defense bonus of being on top of a tower are likewise invulnerable. Everyone else is killed.
The next couple of turns are slow for the majority of the battle, as it takes a couple turns for the undead to get close enough to the walls to make archery possible for either side. The small unit of zombies is assigned to clear out the remainder of the men in Rivers Ford Tower. This little battle drags on for the remainder of the game, with the zombies having to roll very high to break down the door and hit the heavy infantry behind it — they never really succeed at it. The archers eventually take the roof and start pestering the zombies and for a brief period the pushers of the siege tower on the far left. The skeleton archers finally take some time to pick them off, leaving the zombies and heavy infantry to duke it out until the end. There’s not too many photos of this exchange (BigFella was unfortunately seated on the opposite side of the table), but everyone at the table found the stalemate highly amusing.
By turn 4 the skeletal archers get in range and start raining arrows on the defense. The defense fires back, but find their numbers are being greatly thinned by the masses of undead archers. The defenders move their cavalry into position at the sally port, revealing its location on BigFella’s side of the field.
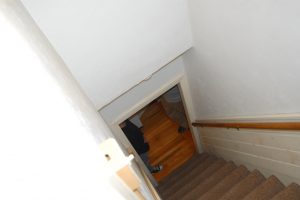
Eventually as the undead push closer the necromancer and his body guards take the hill. Delta asks for a conference, and we pop downstairs. He points out that this is a terrible mistake: the necromancer’s unit is now within range of Pelltar’s wand of lightning. We discuss the odds of losing our necromancer, which Delta calculates as 1 in 9 per round. We contemplate moving the necromancer away, but the defenders have not yet discovered the mistake, so perhaps we’ll be OK. We decide to risk it and leave the necromancer where he is. Luck is with us, the defenders don’t seem to notice this error, and continue to focus Pelltar’s efforts at the closer threats: the undead infantry and archers.
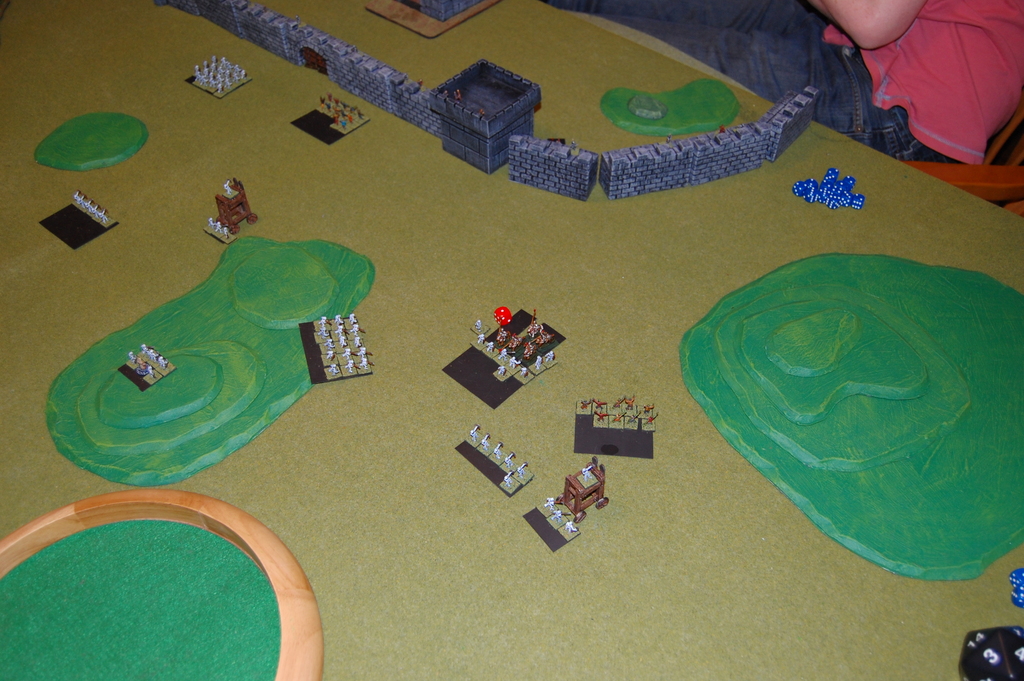
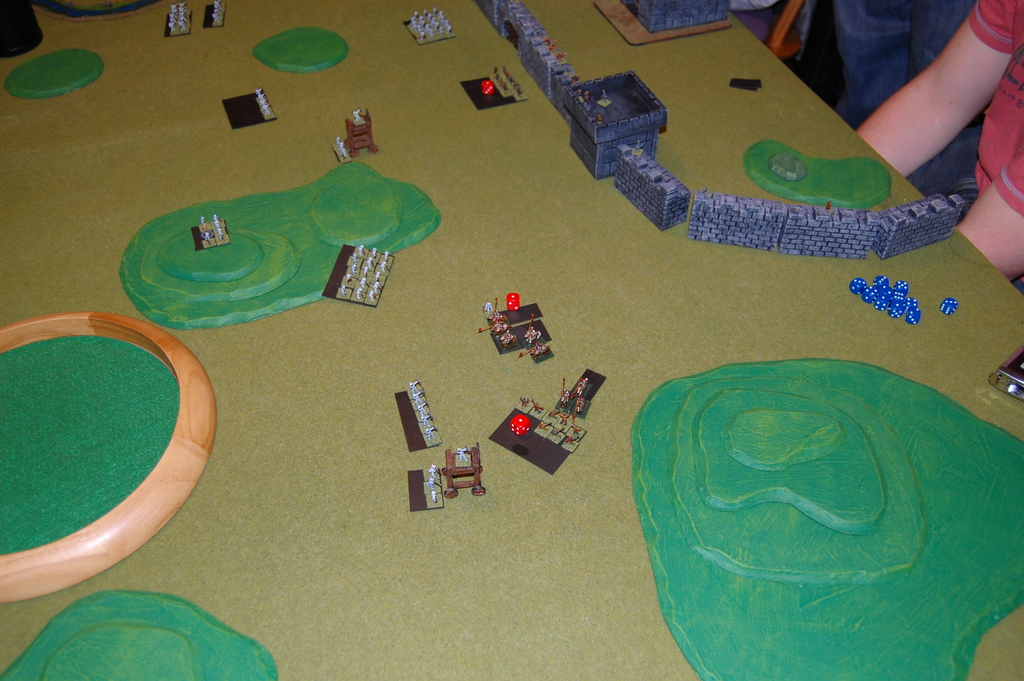
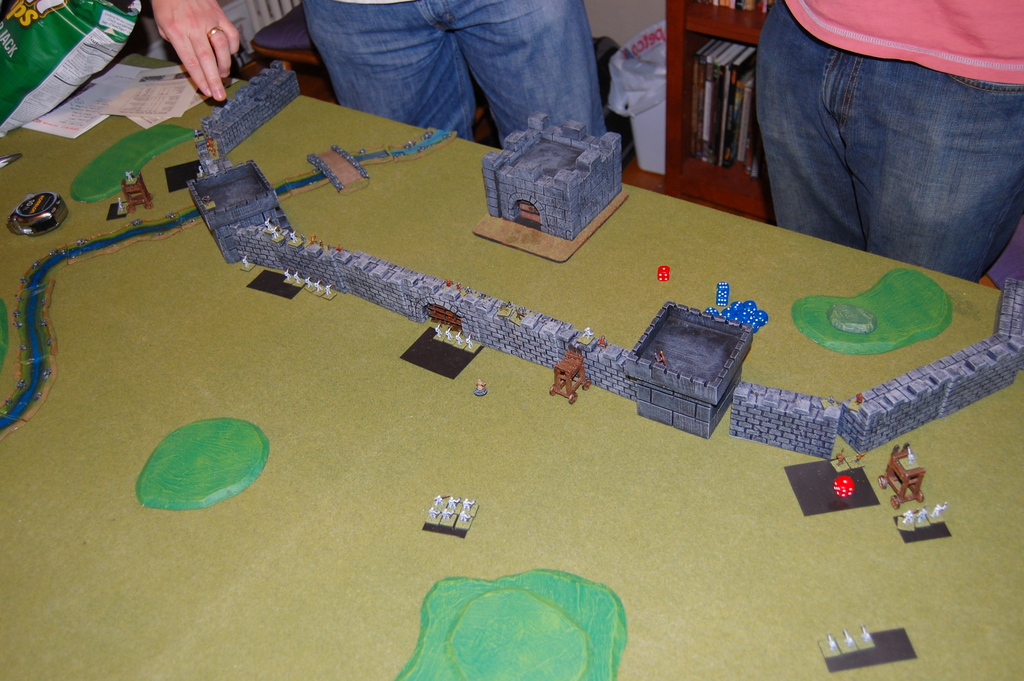
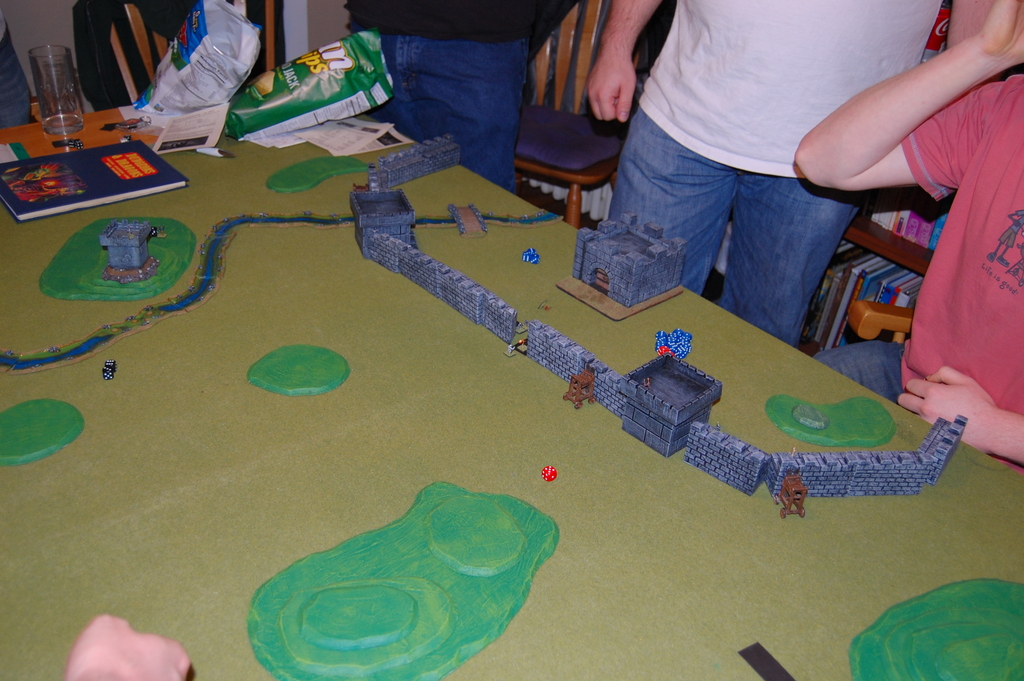
Here’s the scene at the end of turn 4. The cavalry have emerged, but done less damage that hoped for against the skeletal infantry. One more unit of cavalry still waits behind the sally port to be released. In the center, one unit of undead archers have taken many losses from bow fire and Pelltar’s lightning. Likewise we’ve lost some zombies. It’s hard to see in these pictures, but we’ve really killed quite a few archers on the walls. While it looks like the undead have lost a lot of figures, the defenders are really starting to worry as the undead get closer to the walls.
The battle on the right side gets quite heated. The necromancer pulls out one of his biggest spells: the Death Spell. This kills two cavalry models outright with no save. More skeletal infantry start coming down the hills to lend aid, while the zombies and siege tower try to circumvent the cavalry.
In the center and left, the undead are within a move of the walls. The defenders have moved their light infantry and acolytes to the stairs to the towers, waiting to take the walls once contact is made. This is a wise strategy: on the walls too early light infantry are only so much arrow fodder. Once contact is made and ladders are being thrown up, the light infantry will be valuable defenders attacking with double dice against wall climbers!
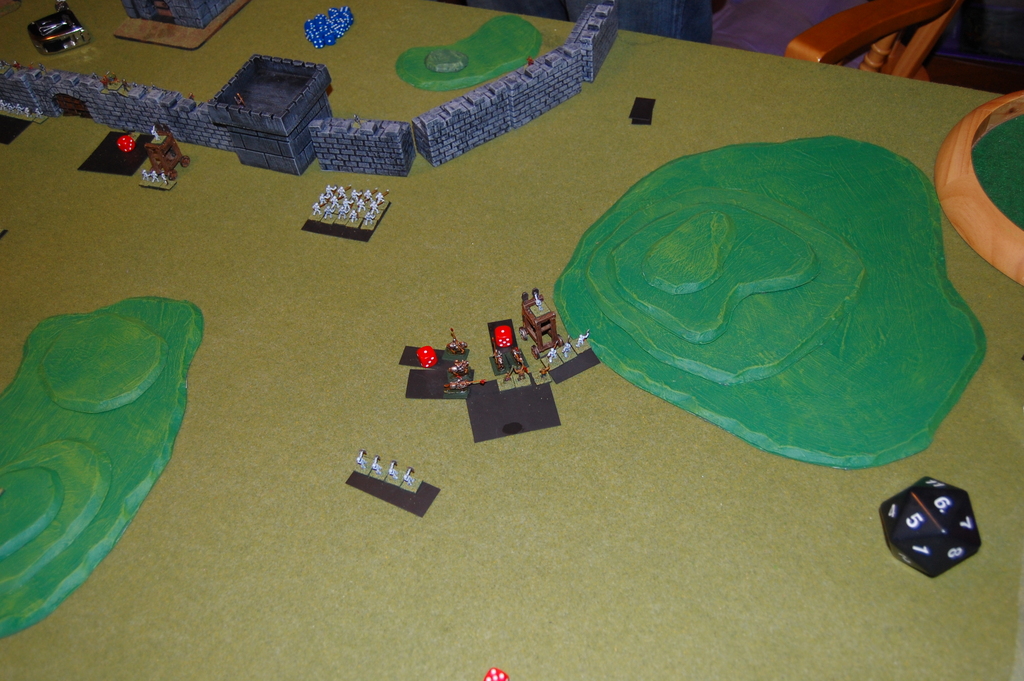
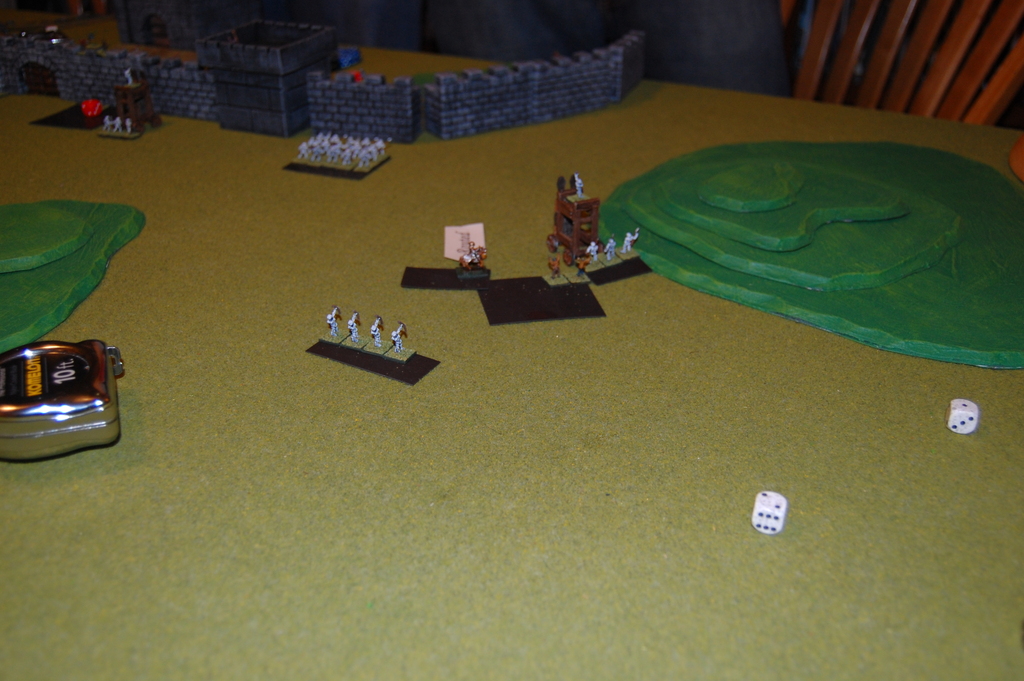
The fighting on BigFella’s flank has got quite heated. The last unit of cavalry have made contact with the zombies and done some damage. They’ve also decimated the skeletal infantry down to just a single model. They have taken losses in return, however, and the undead archers begin to fire into the melee, not caring if they hit cavalry or zombies. Likewise, the necromancer will start firing his wand of fire into the cavalry.
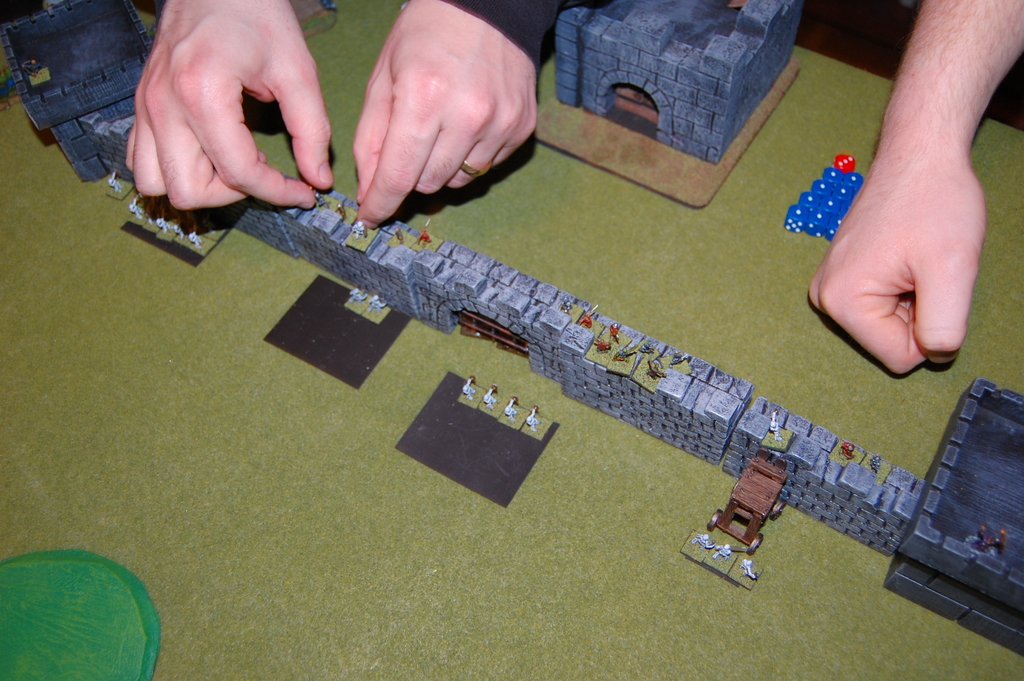
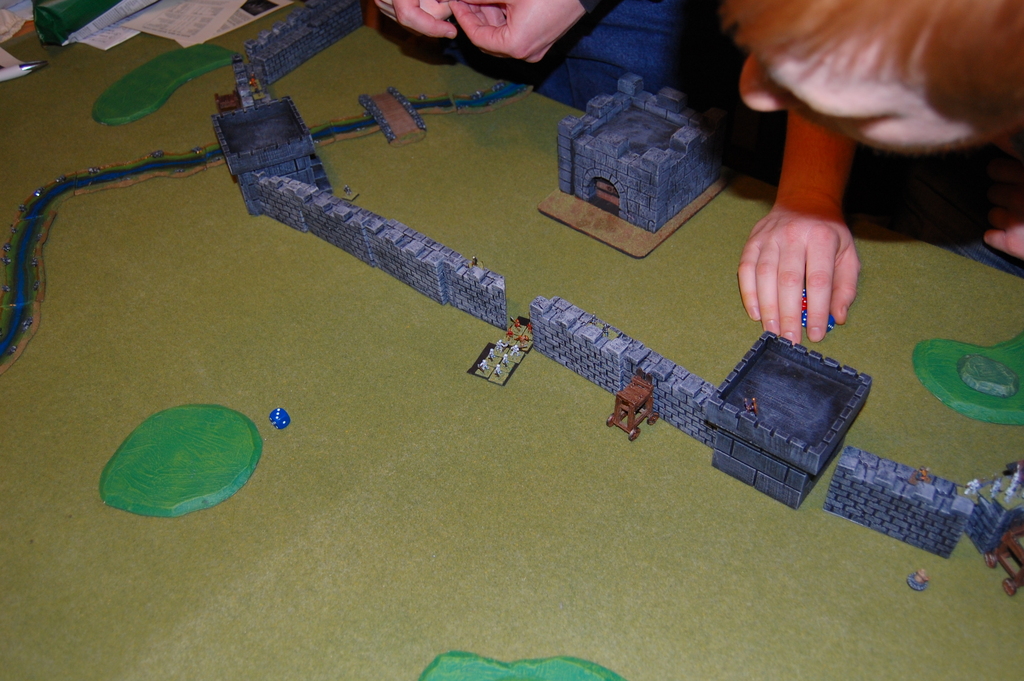
On left and center, the undead have made contact with the wall. Defenders start to bunch up in response to fling down rocks and boiling oil. Note the siege tower on far left has swung around to face the Rivers Ford Tower, who managed to kill one of the models pushing it when it’s side was exposed. It has turned to cover the pushers and allow the skeletal archer to fire at the archers on top of the tower. The other two models atop the tower are heavy infantry and zombies: representing the fierce melee occurring inside the tower itself.
On the far right the battle gets bloody. The skeletal infantry is removed and the cavalry focus on the zombies, whose numbers are rapidly thinning. The siege tower however is squeaking by, and the the skeletal archers continue to fire on the battle. The reinforcement skeletal infantry have been redirected tot he now lightly defended walls, as most defenders have moved towards center to face the climbing undead there. The necromancer continues to delay to aid against the cavalry with his wand of fire.
At long last the wand of fire scores some hits, and the final remaining cavalry model routes. He’ll make it off the table edge in a couple rounds. Massive losses were incurred on the undead side by the cavalry, however, and the defenders have severely delayed the necromancer’s approach towards the walls. Despite the loss of men, all agree that the cavalry were expertly used.
Note the huge unit of 15 skeletal infantry almost at the wall on the right. Their opposition: 3 models of acolytes, freshly pulled from reserves, plus Pelltar’s full attention. The defenders use their entire undead turning power: 3d6 against that unit, in addition to sending two lightning bolts into the unit from Pelltar. Pelltar’s attack guarantees two kills and the turning dice come up 13. The entire unit is obliterated, much to the glee of the defenders.
Meanwhile, undead are taking the walls on left and center. One siege tower has finally come up to the wall, and ladders have brought more skeletons and zombies up. The units they came from are starting to look very thin though. While the defenders took massive losses to archery early on, at the wall they have a huge advantage and the units that make contact quickly find their numbers dwindling. If it weren’t for the undead’s immunity to morale, this battle would have been over long ago.
The struggle at the wall becomes intense. The undead make good progress against any remaining archers or light infantry, however the heavy infantry quickly become the sticking points. The undead seem to be able to do little against them, and the defenders rapidly push them to the front to hold the walls.
Turn 8: the necromancer’s gambit. Delayed by defending against the cavalry it looks like it will take several more turns for him to reach the walls and help sway the battle. I propose a risky idea to Delta: pop him out of his unit of body guards and rush the wall. It will double his movement to 12 inches, but leave him painfully exposed to attack by Pelltar. Fortunately he is magically protected from arrows, so it’s only the lightning attack of his opponent mage that is of concern. We decide to take the risk. Meanwhile, on the right side, BigFella is suprised to find that he still has some forces with little opposition. He moves to take the wall with 3 archers, 2 zombies, and a fully manned siege tower opposed only by one model of light infantry and one of acolytes. Things are looking suddenly good on the right flank.
The necromancer pulls out his second big spell of the game: disintegrate. He destroys a section of wall just to the right of the gate, sending a model’s worth of heavy infantry plummeting to their deaths. Meanwhile, his entourage makes their way to the conveniently placed siege tower, while the skeletons on the right do likewise. In response, Pelltar conjures forth a wall of fire, blocking the undead from reaching the center siege tower. They will instead have to turn and move towards the gap created by the necromancer, which will take more time.
Pelltar drops the wall of fire as the undead reach the gap in the wall, and instead brings out his big spell of the game: Conjure Elemental. A massive earth elemental emerges on the far right, and begins to crush undead in front of him. The necromancer scurries over to that side to use his Dispel to remove that threat from the one spot of wall where the undead are actually making headway. This game is starting to look like a battle of the wizards.
With the undead that were scaling the walls largely taken care of, the remaining infantry climb down the towers and form up behind the wall to defend the breach. What was once a massive battle has been reduced to a fight between 4 light infantry and 6 skeletal infantry.
In the center the battle of skeletons vs. men has gone pretty evenly, with just one model on each side remaining. However, you can see peaking around the corner of the gap in the wall is the last remaining defenders: a couple heavy infantry and archers, not very many but surely enough to take the skeletons. On the far right the necromancer has climbed the wall to discover that all his skeletons have fallen to a single model of heavy infantry and Pelltar’s lightning. Over at Rivers Ford Tower, the last unit of zombies have decided they are tired of wasting their time trying to kill those pesky heavy infantry, and are making their way to the wall. The heavy infantry will make a brave charge out of the tower next turn and take the zombies in the rear, killing them. The brave heroes of Rivers Ford will surely be immortalized in song.
And here is the position the necromancer finds himself in. All his undead are destroyed, and he is being harried by a heavy infantry and Pelltar. If he could make it to the tower, it might become an interesting wizard duel, which I would have resolved using standard D&D combat instead of Book of War. However, that heavy infantry in front of him will likely delay him long enough to bring the remaining defenders to bear. With not a single model of his force left to him, the necromancer takes the better part of valor and teleports away.
The victories defenders, or what remains of them. This group includes Pelltar, the Heroes of Rivers Ford, 3 more models of heavy infantry, two of light infantry, and two of archers. It was a long and bloody battle, but Bridgefaire was saved in the end. Now everyone eagerly awaits the normal D&D session when the party returns to the city. How bad will the devastation be? Are there enough men left in the city to rebuild? And where exactly did that necromancer disappear to?
All in all an excellent game, well balanced, and very exciting. Thanks so much to Delta, BigFella, and my players for joining me in this game. When running a sandbox oriented campaign, it’s so much more interesting to resolve large scale conflicts this way. It really will fuel the campaign for some time to come.


Great write up and a great game. It was really fun. Thanks to Paul for hosting, BJ for the pictures and Dan for coming up with a great game.
But as the general and controller of Peltar I want to point out, it was not a mistake that we didn’t attack the necromancer, it was a choice. Peltar could choose to attack him at a 1 in 9 chance of killing him or attack the other undead units and score guarantee hits. When Peltar is attacking skellies, he can remove two each turn.
Sun Tzu says “So in war, the way is to avoid what is strong and to strike at what is weak” 🙂
What a great game! (In particular, the photo down the stairs is just hilarious.) And Matt, thanks so much for writing up what you guys were thinking on the other side — I agree, that’s pretty compelling logic. Perhaps I got a bit too fixated on how enormously much it was going to suck for us if we lost our wizard early in the game. Thanks for playing so well! 🙂